

Nimbus Paint Lining
Fuel Tank LiningRear Mudguard Lining
Front Mudguard Lining
Paint lining - or pin-striping - was done by hand at the factory. As a consequence, there may be some small variations in the dimensions as is usual through applying craftsmanship to something. Stick-on tape was never used. Never any lining to headlamps or handlebars.
The number and thickness of stripes is dictated by the year, model, and, customer. See the diagrams below for information about this.
Striping itself was only SILVER or GOLD.
The only F&N-stipulated colours for the stripes relating to machine colour schemes are:
- Silver was ALWAYS applied to blue and 'Sport' machines ('Sport' Nimbus are ALWAYS blue)
- Gold was ALWAYS applied to Red machines
Other colour paint finishes had gold or silver lining that suited the main colour best.
Fuel Tank
Fuel Tanks were lined like this:
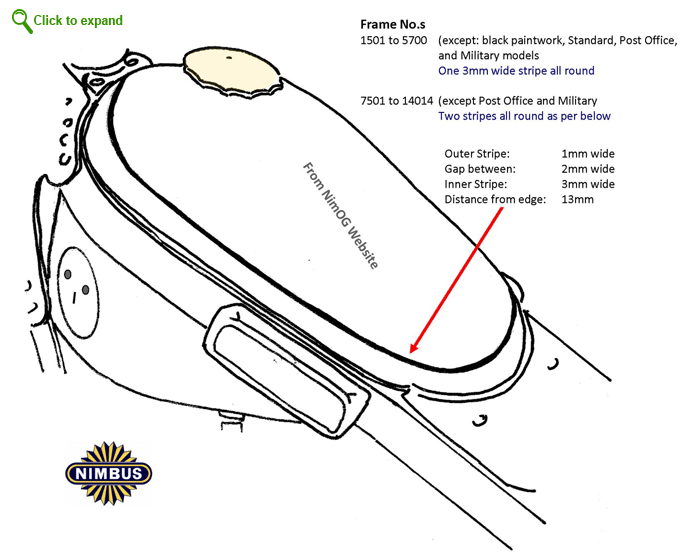
Click to show fullscreen
Here are two examples of fuel tank lining. I'll leave you to work out which bike is from the 1930s, and which from the 1950s from the info in the diagram above.
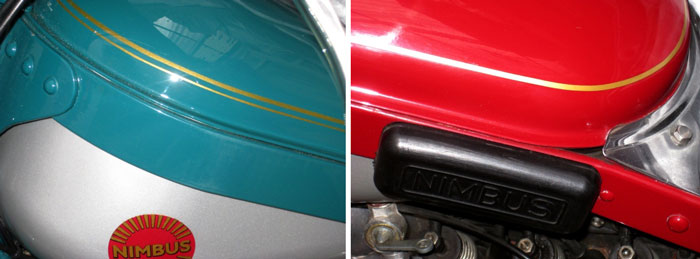
Examples of Fuel Tank Lining
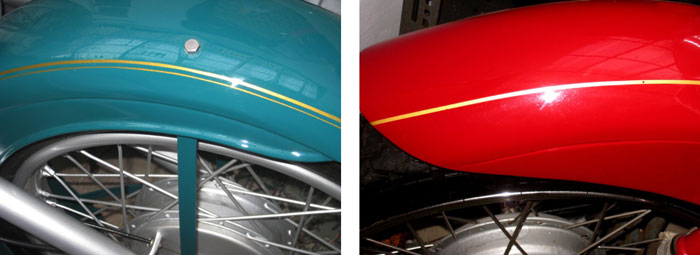
Rear Mudguard (Fender)
Mudguard lining follows the same rules and dimensions for the fuel tank pretty much. The rear mudguard is straightforward, and the information can be seen in the diagram below.

Click to show fullscreen

Examples of Mudguard Lining
Front Mudguard (Fender)
The 'rules' for size and colour apply equally for the front mudguard. The difficulty here is specifying the finite position. This is because there are a number of profile shapes - from 'banana' to standard curves - so specifying from the edge doesn't work. The lines must follow an equal circumference around the mudguard on a radius from somewhere around the wheel axle - but this will depend on the curve on the mudguard itself. See the pictures below.
The easiest way to specify the position is from the centre-line of the front mudguard, rather than the edge of it. Because the lining was hand-crafted - there are variations. The example with dimension shown below is of a professionally restored Nimbus - the work was carried out by a Nimbus specialist.
One approach would be to put the lining where it looks well balanced to the eye - where it looks 'right'.
Traditional curved mudguard (later type) and Nimbus 'Banana' shape (early type)

Example of positioning the INNER stripe on a late model Nimbus
Back to Technical ToC Top of page